
If your organisation uses either E3 or E5 licensing, chances are you’ve come across the challenge of how to maintain the license pool and by that I mean:
- harvesting unused licenses
- ensuring you only allocate to real users (as opposed to service accounts etc)
- ensuring that no admin accounts have a license
While most know it’s easy to manage allocation via PowerShell, what most IT managers are looking for is some form of automation that takes care of this admin intensive stuff freeing up staff to keep the lights on. As an example, you may not want everyone to have access to Microsoft Forms but you want requests for it to be handled automatically without the need for an admin to manually assign a license. Or, you may want a the PMO head to be responsible for assigning MS Project licenses but not have to give away permissions in (or train them to use) AAD. Well there is a solution, you just have to put a little effort and planning in upfront.
To demonstrate this process, we will assume you have an E3 and you want all users to have all the components apart from Project for Office, Viva Learning Seeded and Yammer Enterprise. Additionally, you’d like the Project Manager for the new Yammer rollout to approve Yammer requests.
At a high level we’ll complete the following tasks to configure this for the estate:
- Create a dynamic group that contains our users, and enable the base licence assignments
- Create assignment groups for each of the excluded applications (Project, Viva, Yammer)
- Create Access Packages for each of the excluded applications
Step 1 - Baseline dynamic group
AAD gives us the ability to create an automatic membership group with several rules i.e. the entity needs to match the rules to automatically become a member. Using a simple set of rules, we can include users in our estate. First, open Active Directory and create a new group (you’ll need at least the Groups Administrator role for this).
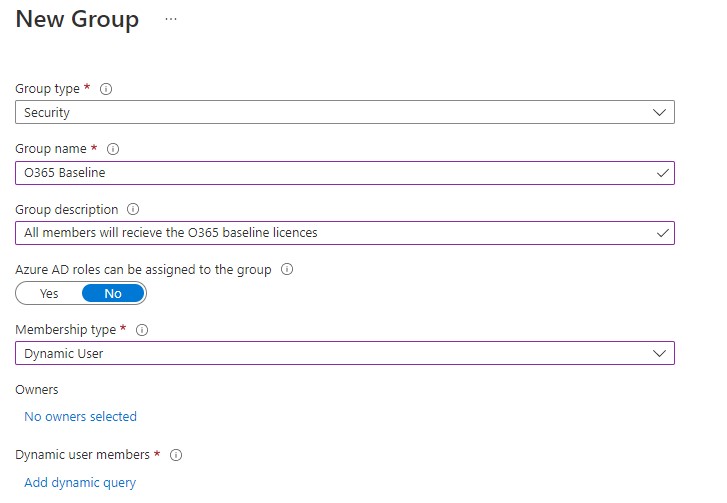
Complete the basic information ensuring you add a description and change the Membership type option to Dynamic User. Next select Add dynamic query which will bring you to the configure rules screen where our first rule will check that an account is enabled as in the image below.
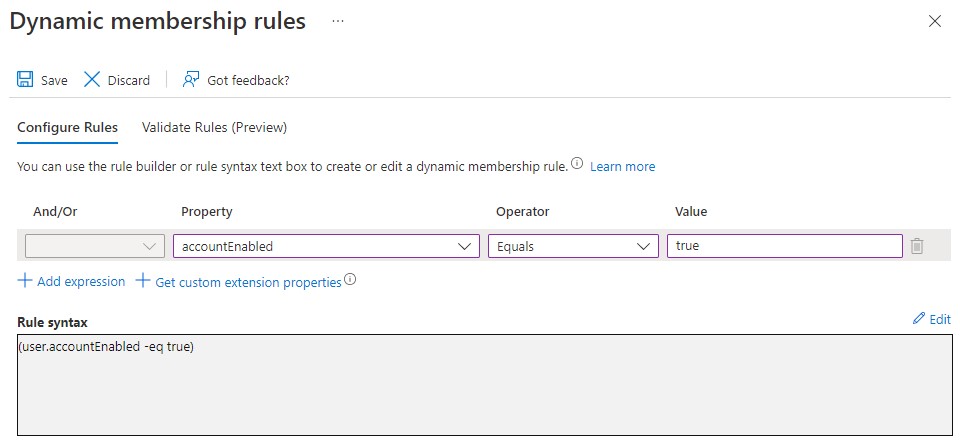
Add the subsequent rules in the table below by clicking Add expression for each new line.
| And/Or | Property | Operator | Value |
|---|---|---|---|
| And | displayName | Not Contains | (ADM) |
| And | displayName | Not Contains | Service |
| And | userType | Equals | Member |
As you can see, administrator accounts in my directory have the suffix (ADM) in the display name and service accounts have ‘Service’ in the display name, you may well use other conventions. Either way you can change the rules to eliminate accounts of the type you don’t want to apply a license to.
Once we’ve added all our conditions, we switch to the Validate Rules tab and add a few identities to test with by clicking on *Add users and selecting/searching for some test subjects. Remember we’re validating the rules we just configured so we want to pick identities that we’re trying to both include and exclude from our group. You will get a status indicator showing if the account will or will not become a member. Depending on the results you may need to go back and adjust your rules.
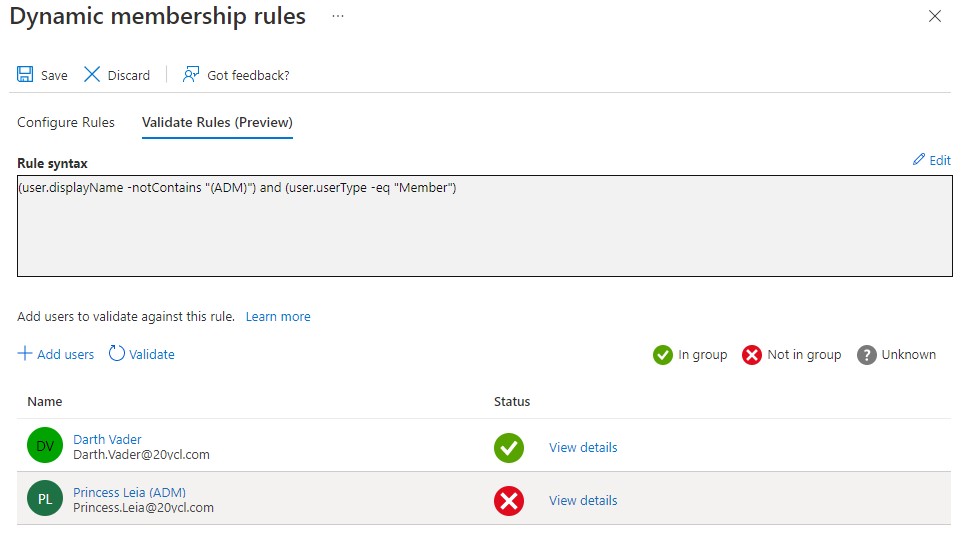
This approach assumes that you have some standardisation and/or naming conventions in place as far as your identity management goes. You may find that you have some work to do to eliminate service or admin accounts from the group.
Step 2 - The Baseline
Assuming you now have a group that only contains the users your interested in assigning an O365 license to, we can now allocate the minimum license set to the group. In AAD, go to Groups on the properties of your dynamic group and select Licenses. You should now see something similar to this:
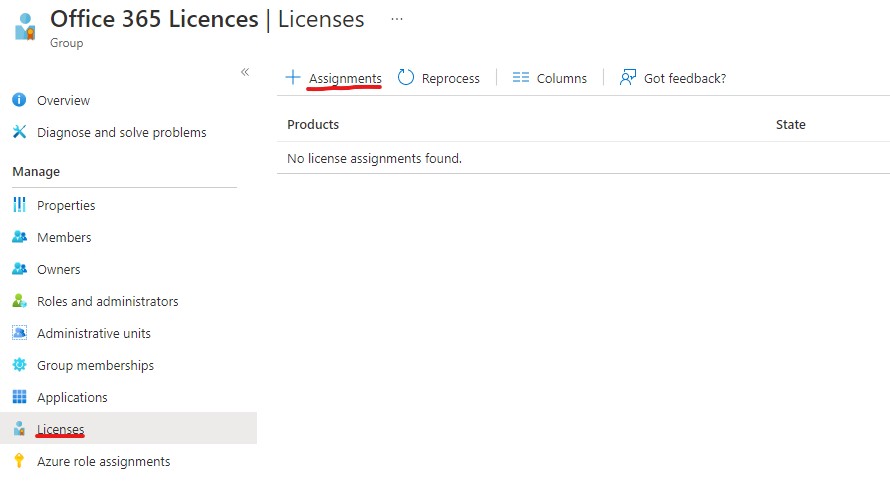
Select Assignments and put a tick next to the product we’re going to assign to this group. Again, this group will have the absolute minimum set of licenses we want to apply so you may just choose E3 from this list or you may have E3 and Enterprise Mobility & Security E3 (if that’s what you own).
When you tick a box, the licence subset will appear to the right, allowing you to include or exclude components. Using our example criteria from before, this is what our selection looks like:
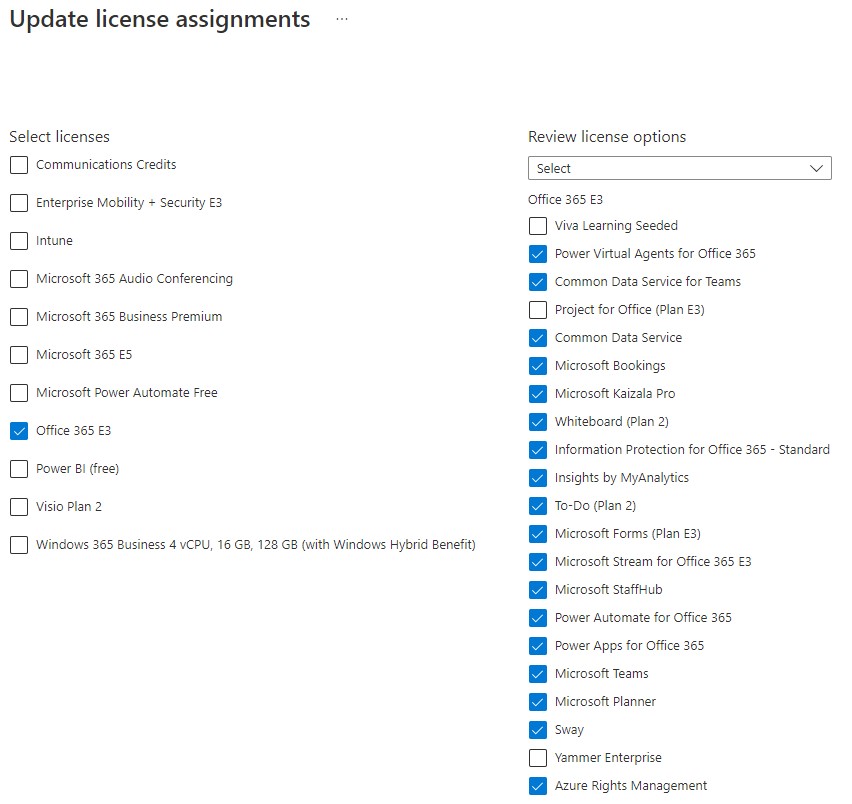
Clicking on Save writes the changes and that’s it for the baseline allocation. Every member of the group will now be allocated the components you selected and more importantly, when an identity is no longer a member of the group (e.g. you disable/delete an account as the user left the company), that licence will be recovered and go back into your pool.
Step 3 - Requesting the extra bits
Now we’ve allocated the baseline and removed that chore from our daily work, what about the second part of our criteria; we want the project manager for the Yammer rollout to decide who gets a licence (not a very real world example I grant you but will serve our purpose).
While we trust our PM we don’t want to give her some sort of admin rights in AAD, we just want a simple solution where she can just approve or deny the request. It would also be ideal that the requesters manager approves the request, just to ensure they are aware. This is where Identity Governance and Access Packages can help.
First some naming conventions:
- Access Package - a collection of permissions bundled together, that a user can request access to.
- Catalogs - hold a collection of access packages e.g. Office products or all HR SharePoint sites
- Access Reviews - automated, scheduled reviews of a user’s access e.g. every 90 days verify with the user that they still need MS Project.
- Resource - An AAD group, and Azure Enterprise Application or a SharePoint site i.e. the thing the users can request access to.
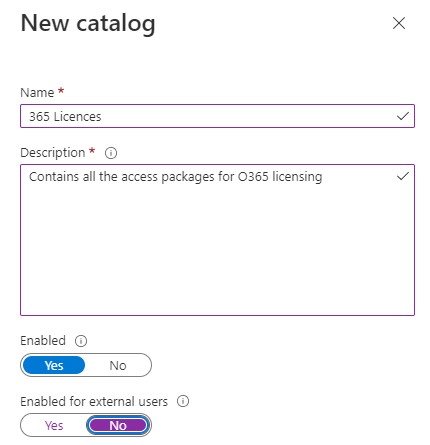
Ok with that out of the way, lets go back into AAD and from the side menu choose Identity Governance. Under Entitlement Management select Catalogs, select New Catalog and give it a name and a description and select No under Enable for External users.
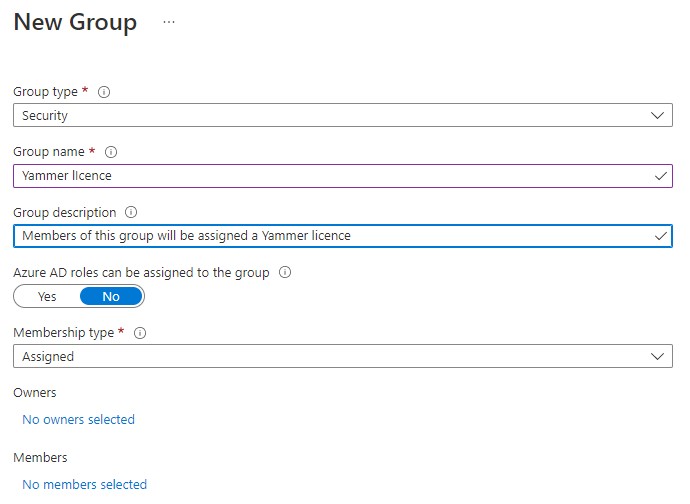
Next we need to create a new AAD (security) group which users will be added to when they need a Yammer licence. As previously, create a standard group with appropriate details like so:
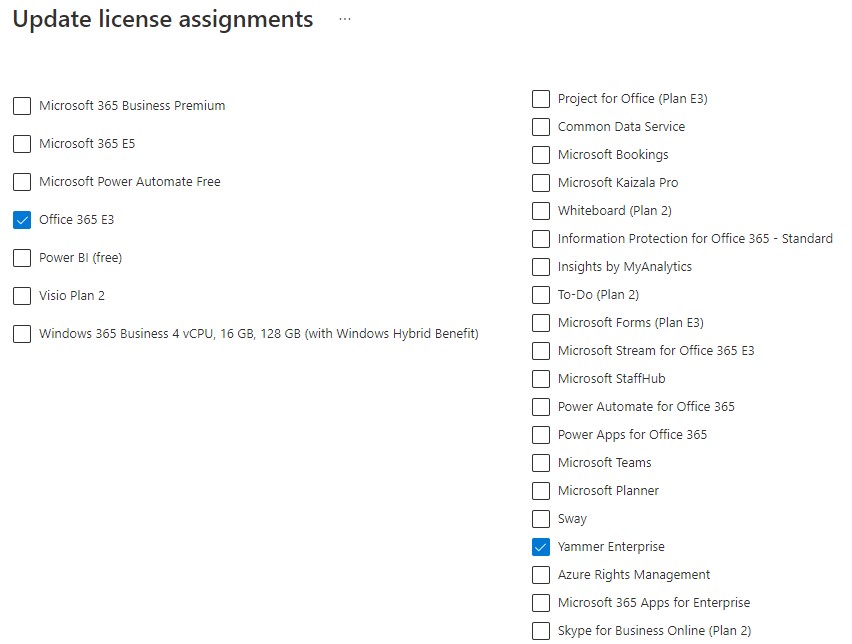
Once the group is created, open it and choose Licenses from the left menu and Assignments from the centre panel. Select Office 365 from the list on the left and then un-tick everything except Yammer
Once saved, go back into Identity Governance and open the Catalog you created earlier. Chose Access Packages* from the left menu and New access package from the centre panel. Now some quick steps:
- Basics - Enter a name for the package and a description
- Resource Roles - Select Groups and Teams and find the Yammer group you just created (remember to hit select)
- Requests - Select For users in your directory
- Requester information - You can request any information in any format but for our purpose, enter a short question and pick short text and tick the required box.
- Lifecycle - here you decide how long before the assignment expires, for most things I pick 365 days. The Access Reviews option requires the user/manager to re-justify the access to the application, based on the number of days you select (Useful when assigning to contractors).
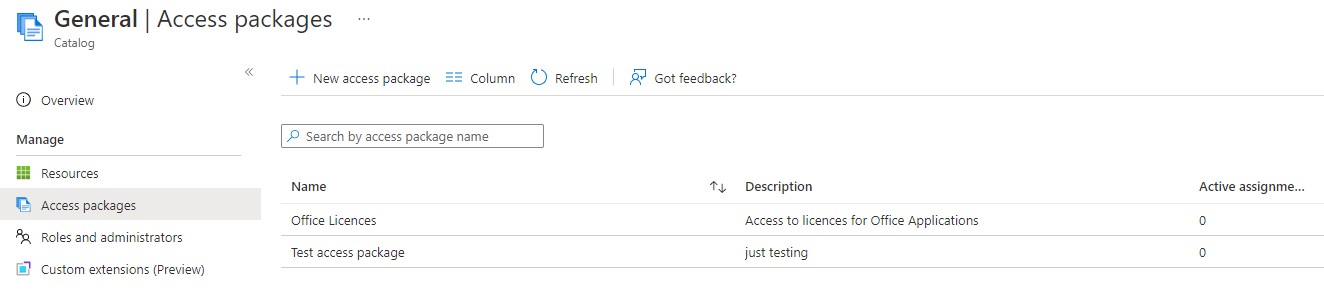
Skip through the rest of the options and hit Create. You should now see your newly created access package listed. Opening it you bee able to browse through the different sections and see the options you chose in the wizard you just completed. Once users have been allocated the package, they will be listed on the Assignments page and any outstanding request, obviously appear on the Requests page.
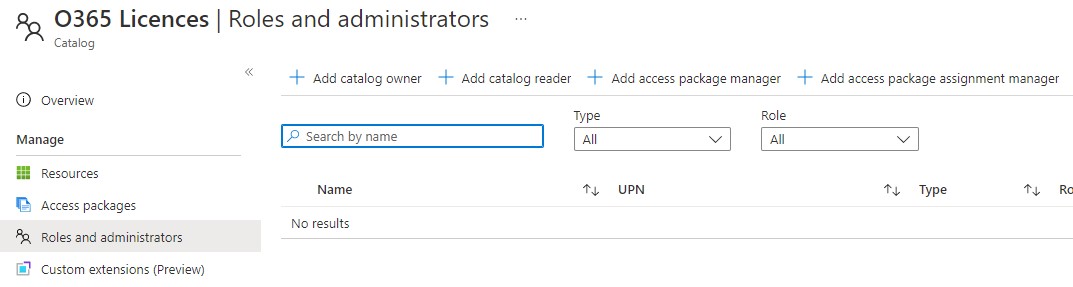
Going back to the Catalog level, we have an option called Roles and administrators. In here there is a further option called Add access package assignment manager and using this we pick our PM who will be responsible for assigning the licences.
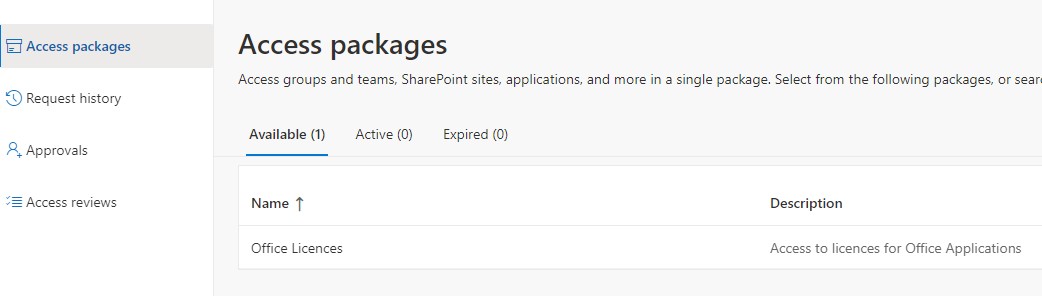
Any user in your estate can now go to https://myaccess.microsoft.com and pick the Yammer access package by completing the questions you configured, before the workflow kicks in for the approvals. Not only will admins have full visibility of who has authorised access to the licence from within the access package, there will also be automated recovery when a user falls out of scope of the rules. You can now create and access package for each of the excluded apps (inside the 365 Catalog), changing the the questions and rules as appropriate.
Taking it further
You don’t just have to use this for O365 licence assignment. As you saw, with access packages you can add users to any AAD group meaning you could use the myaccess portal for requesting access to anything - thing applications, SharePoint sites, Teams groups.
A few final thoughts.
- In some organisations, licence request tickets form part of the SOX control mechanism and there maybe a concern that this process causes that process to break however, the opposite is true. Using a ticket as a measure just ensures the request was proper, it doesn’t ensure compliance. If the focus of the SOX control is moved from the request process to the Access Package, the control is much more robust.
- Assuming you use Intune to push applications to endpoint devices, that process is usually handled by inclusion in an AAD group (i.e. the user is added to a group and the device receives the app). Create an access package for the group with Require Approval option set to no so that any request automatically adds the user to the group, which in turn triggers the deployment to the endpoint -there’s no need for an admin to be involved. Obviously you should only do this for apps that you don’t need to control licenses for. :smile:
- AAD Dynamic Groups are awesome, especially when used in conjunction with things like identity extension attributes (that’s an idea for a post right there!). Example: As a company you have some high-level organisational groups (HR, Finance, IT…) and for each user, you add an extension attribute based on which org structure they are part of. This attribute can be a criteria for a dynamic group, the inclusion of which grants you access to a base set of apps/SharePoint services (e.g. everyone in IT gets access to the IT SharePoint pages, an MS Project licence and the app installed). As users moves between departments, all you need to do is change the extension attribute on their identity and they have all the basic apps and access they need (hint - you can even automate this process too).
So that’s it, lots to think about and many opportunities to remove a significant amount of admin overhead from your admin teams. Hope this was helpful and feel free to reach out if you need some help implementing.